
How to install qBittorrent in a TrueNAS jail.
Revised on: March 15, 2025
Installation of the torrent client qBittorrent on a Mac or a PC is straightforward: download the installer for your system from the qBittorrent website qbittorrent download and off you go.
Installing qBittorrent however on your server that runs TrueNAS Core, and preferably in a jail, is less straightforward. It’s not difficult, but takes some time and attention. Running a torrent client on your server instead of your Mac has certain advantages. If that’s what you want, please read on.
Creation of a new jail for qBittorrent.
As we speak, my server is running TrueNAS core 13.0-U6.2. As an example let's assume your WiFi router has IP4 address 192.168.0.1 and you want to give your new jail the name qBittorrent with IP4 address 192.168.0.99. Take care to change these addresses to your own IP's lateron.
To create a new jail, open TrueNAS, go to Jails and click Add. In the new screen click "Advanced Jail Creation".
Make the following changes under the various headings:
Basic Properties:
         Name: qBittorrent
        Jail Type: Default(Clone Jail)
        Release: select the latest
        Checkmark VNET
        vnet_default_interface: auto
        IP4 interface: vnet0
        IP4 Address: 192.168.0.99
        IP4 Netmask: 24
        IP4 Default Router: auto or 192.168.0.1
Jail Properties:
        allow_set_hostname: put a checkmark
        allow_raw_sockets: put a checkmark
Network Properties:
	interfaces: vnet0:bridge0
	host_hostname: qBittorrent
	resolver: etc/resolv.conf
	ip4.saddrsel: checkmark
	ip6.saddrsel: checkmark
	ip4: New
	ip6: New
Custom Properties:
checkmark host_time
Click SAVE.
If everyting is OK you will find your new qBittorrent jail under Jails. Click ">" at the end of the line and start the Jail. After a successful start you may open it's Shell.Installation of qBittorrent in the jail.
Assuming that you are now in the qBittorrent jail shell, execute the following commands:
   - pkg
   - pkg install nano
   - pkg install qbittorrent-nox
Let's start qBittorrent and check if it's working. Type the following command:
- qbittorrent-nox
Please note in the last line of the info this command shows, the username 'admin' and a tempory password. Write it down, but don't close the shell yet !!
In the browser on your PC open the website: http://192.168.0.99:8080. You should see the qBittorrent login screen. Login with username admin and temporary password you just wrote down. I am pretty sure it works and you are in. Click Tools -> Options, and click the tab 'WebUI'. Under the heading 'Authentication' change username and password as you want, but do it now! Click Save.
Next click tab 'Downloads' an change Default Save Path to /media. Click Save.
Check if it works: logout to return to the loginscreen, and login with your new username and password.
Return to the jail shell and type Ctrl C to stop qBittorrent. Restart qBittorrent as a daemon with this command:
- qbittorrent-nox -d
Return to your browser and login: It works!
Just to make sure, check the resolv.conf file with the command:- nano /etc/resolv.conf
Edit this file if you feel it's needed.
-
Run the command 'qbittorrent-nox' after a (re)start of the jail:
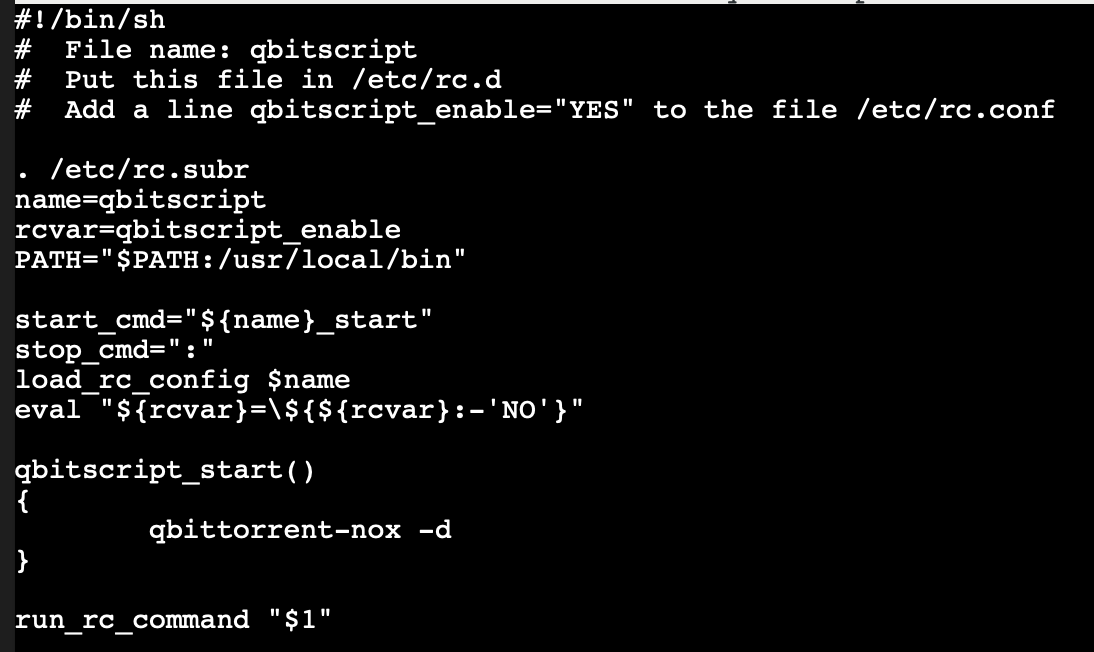
As explained in the FreeBSD Handbook, to run a command automatically when launching a jail, an rc.d script file is needed. Unfortunately a scriptfile like the one below does NOT work anymore with qBittorrent version 4.6.2 and later . It's my guess that after restarting the jail automatically with the script, qbittorrent-nox does not pickup the configuration file with your username and password.
So don't use this script !
What you have to do each time after (re)start of the qBittorrent jail: step into the qBittorrent jail shell and run the command:- qbittorrent-nox -d
Now the qBittorrent login screen will accept the username and password you did define earlier (see 2. above).
This script file below does not work anymore !

Giving qBittorrent access to a folder outside the jail.
The files qBittorrent downloads into the jail's /media folder are not accessible from outside the jail. Applications like Plex media server may only access folders in the root of TrueNAS. That's why the qBittorrent jail should mount on it's /media folder a 'downloads' folder in the root.
Step into the TrueNAS root shell and locate the folder 'downloads' in your zfs pool. If you don't have this folder, create it:- zfs create name_of_your_zfs_pool/downloads
The file is located at /mnt/name_of_your_zfs_pool/downloads.
Leave the TrueNAS root shell and step into the qBittorrent jail shell.
Stop the jail and click MountPoint -> Actions -> Add. Under 'Source' use the GUI to find /mnt/name_of_your_zfs_pool/downloads and click it. Under 'Destination' click media. Click 'Submit' and check the result.
Restart the jail and don't forget the command qbittorrent-nox -d. Check with a torrent (or a testfile) that it works and the downloaded movie shows up in the downloads folder on the TrueNAS root as well.
How to update qBittorrent.
When in the future you want to update qbittorrent-nox, all you have to do is step into the qBittorrent shell, and execute the following two commands:
- pkg update && pkg upgrade
Restart the Jail and don't forget to run command 'qbittorrent-nox -d' in the jail.
PLEASE NOTE: If after updating and starting qbittorrent-nox -d you get an error like /lib/libcxxrt.so.1 not found, it means that the FreeBSD version running your qBittorrent jail is too old. So you need to update, for example from 13.3 to 13.4 or 13.5.
To do so, exit the qBittorrent jail, and step into the TrueNAS root shell. To update only the qBittorrent Jail, run the following command:
- iocage upgrade -r 13.4-RELEASE qBittorrent
Upgrading will take quite some time. Each time it stops with [END], click q. When finished, restart your qBittorrent Jail. Run the command qbittorrent-nox -d and things should work.